Avoid doing these 7 things to keep your Attrition Scrubber running efficiently
Attrition Scrubbers are used to remove surface contaminants like coatings and stains from sand-size fractions, with the goal being to increase durability and improve sand equivalency. Keeping your Attrition Scrubber running efficiently is important for reaching this goal. Here are seven things you must avoid if you want to keep your Attrition Scrubber operating at maximum efficiency.
1. Forgetting to check the oil level before start-up
One of the most important things you should do before start-up each day is check the oil level in the gear reducer. A sufficient level of oil is needed to keep the Attrition Scrubber in operation.
In addition, the oil level can alert you to any potential issues inside the gear reducer, such as a leaking seal. Unlike when a screw washer seal fails and the oil leaks onto the outside of the machine, a leaking seal inside an Attrition Scrubber gear reducer causes the oil to enter the machine and contaminate the material being processed.

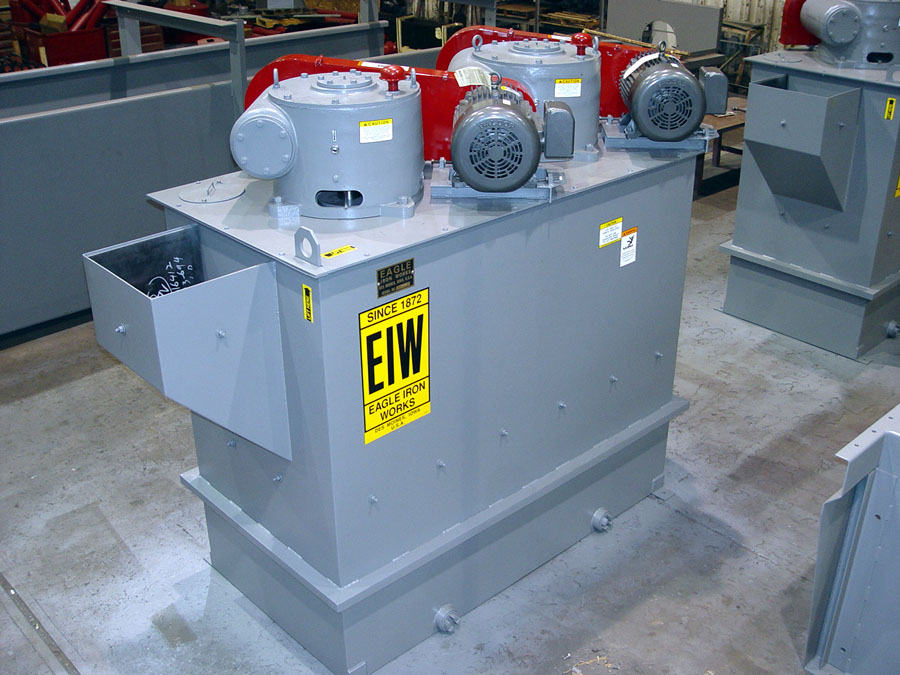
An Eagle Iron Works Attrition Scrubber.
While the oil is not necessarily harmful to the material, a leaking seal could be devastating to the Attrition Scrubber itself. Because the leak is happening inside the machine, it may go unnoticed until serious problems begin to arise with the gear reducer. At that point, you may be investing more into fixing the problem than simply replacing the faulty seal. Checking the oil level each day can help catch any leaks before they become a problem.
You’ll want to be sure to check the oil level before starting up your Attrition Scrubber for the day. Once the machine starts running, the oil in the gear reducer will slosh around, obscuring the sight glass and giving an inaccurate reading of the oil level.
2. Letting the sight glass get cloudy
The sight glass, or oil level gauge, allows you to see into the gear reducer to check the oil level. Standard sight glasses are made of vinyl or plastic, which can become discolored or cloudy over time, making it difficult if not impossible to check the oil level accurately.
Be sure to keep the sight glass clean and free from a buildup of debris. If the sight glass becomes discolored to the point you can no longer see through it, you must replace it. If the sight glass breaks, don’t just plug up the hole — you must replace the gauge.
3. Allowing material to build up on top of the machine
Attrition Scrubber motors have fans with cooling fins to help keep them from overheating. Because the motors are located on top of the Attrition Scrubber, they can be subject to a buildup of material coming from other areas of the plant. If material builds up on the motors’ cooling fins, the motors can overheat and fail, resulting in unexpected downtime and a loss of production until the motors are replaced.
4. Creating a surge of material
A constant feed to the machine is necessary for the most efficient attrition, as the rate of discharge from the machine is directly dependent on the feed to the machine. Avoid material surges that come with irregular feeding or frequent stops and starts.
5. Allowing the paddles to wear
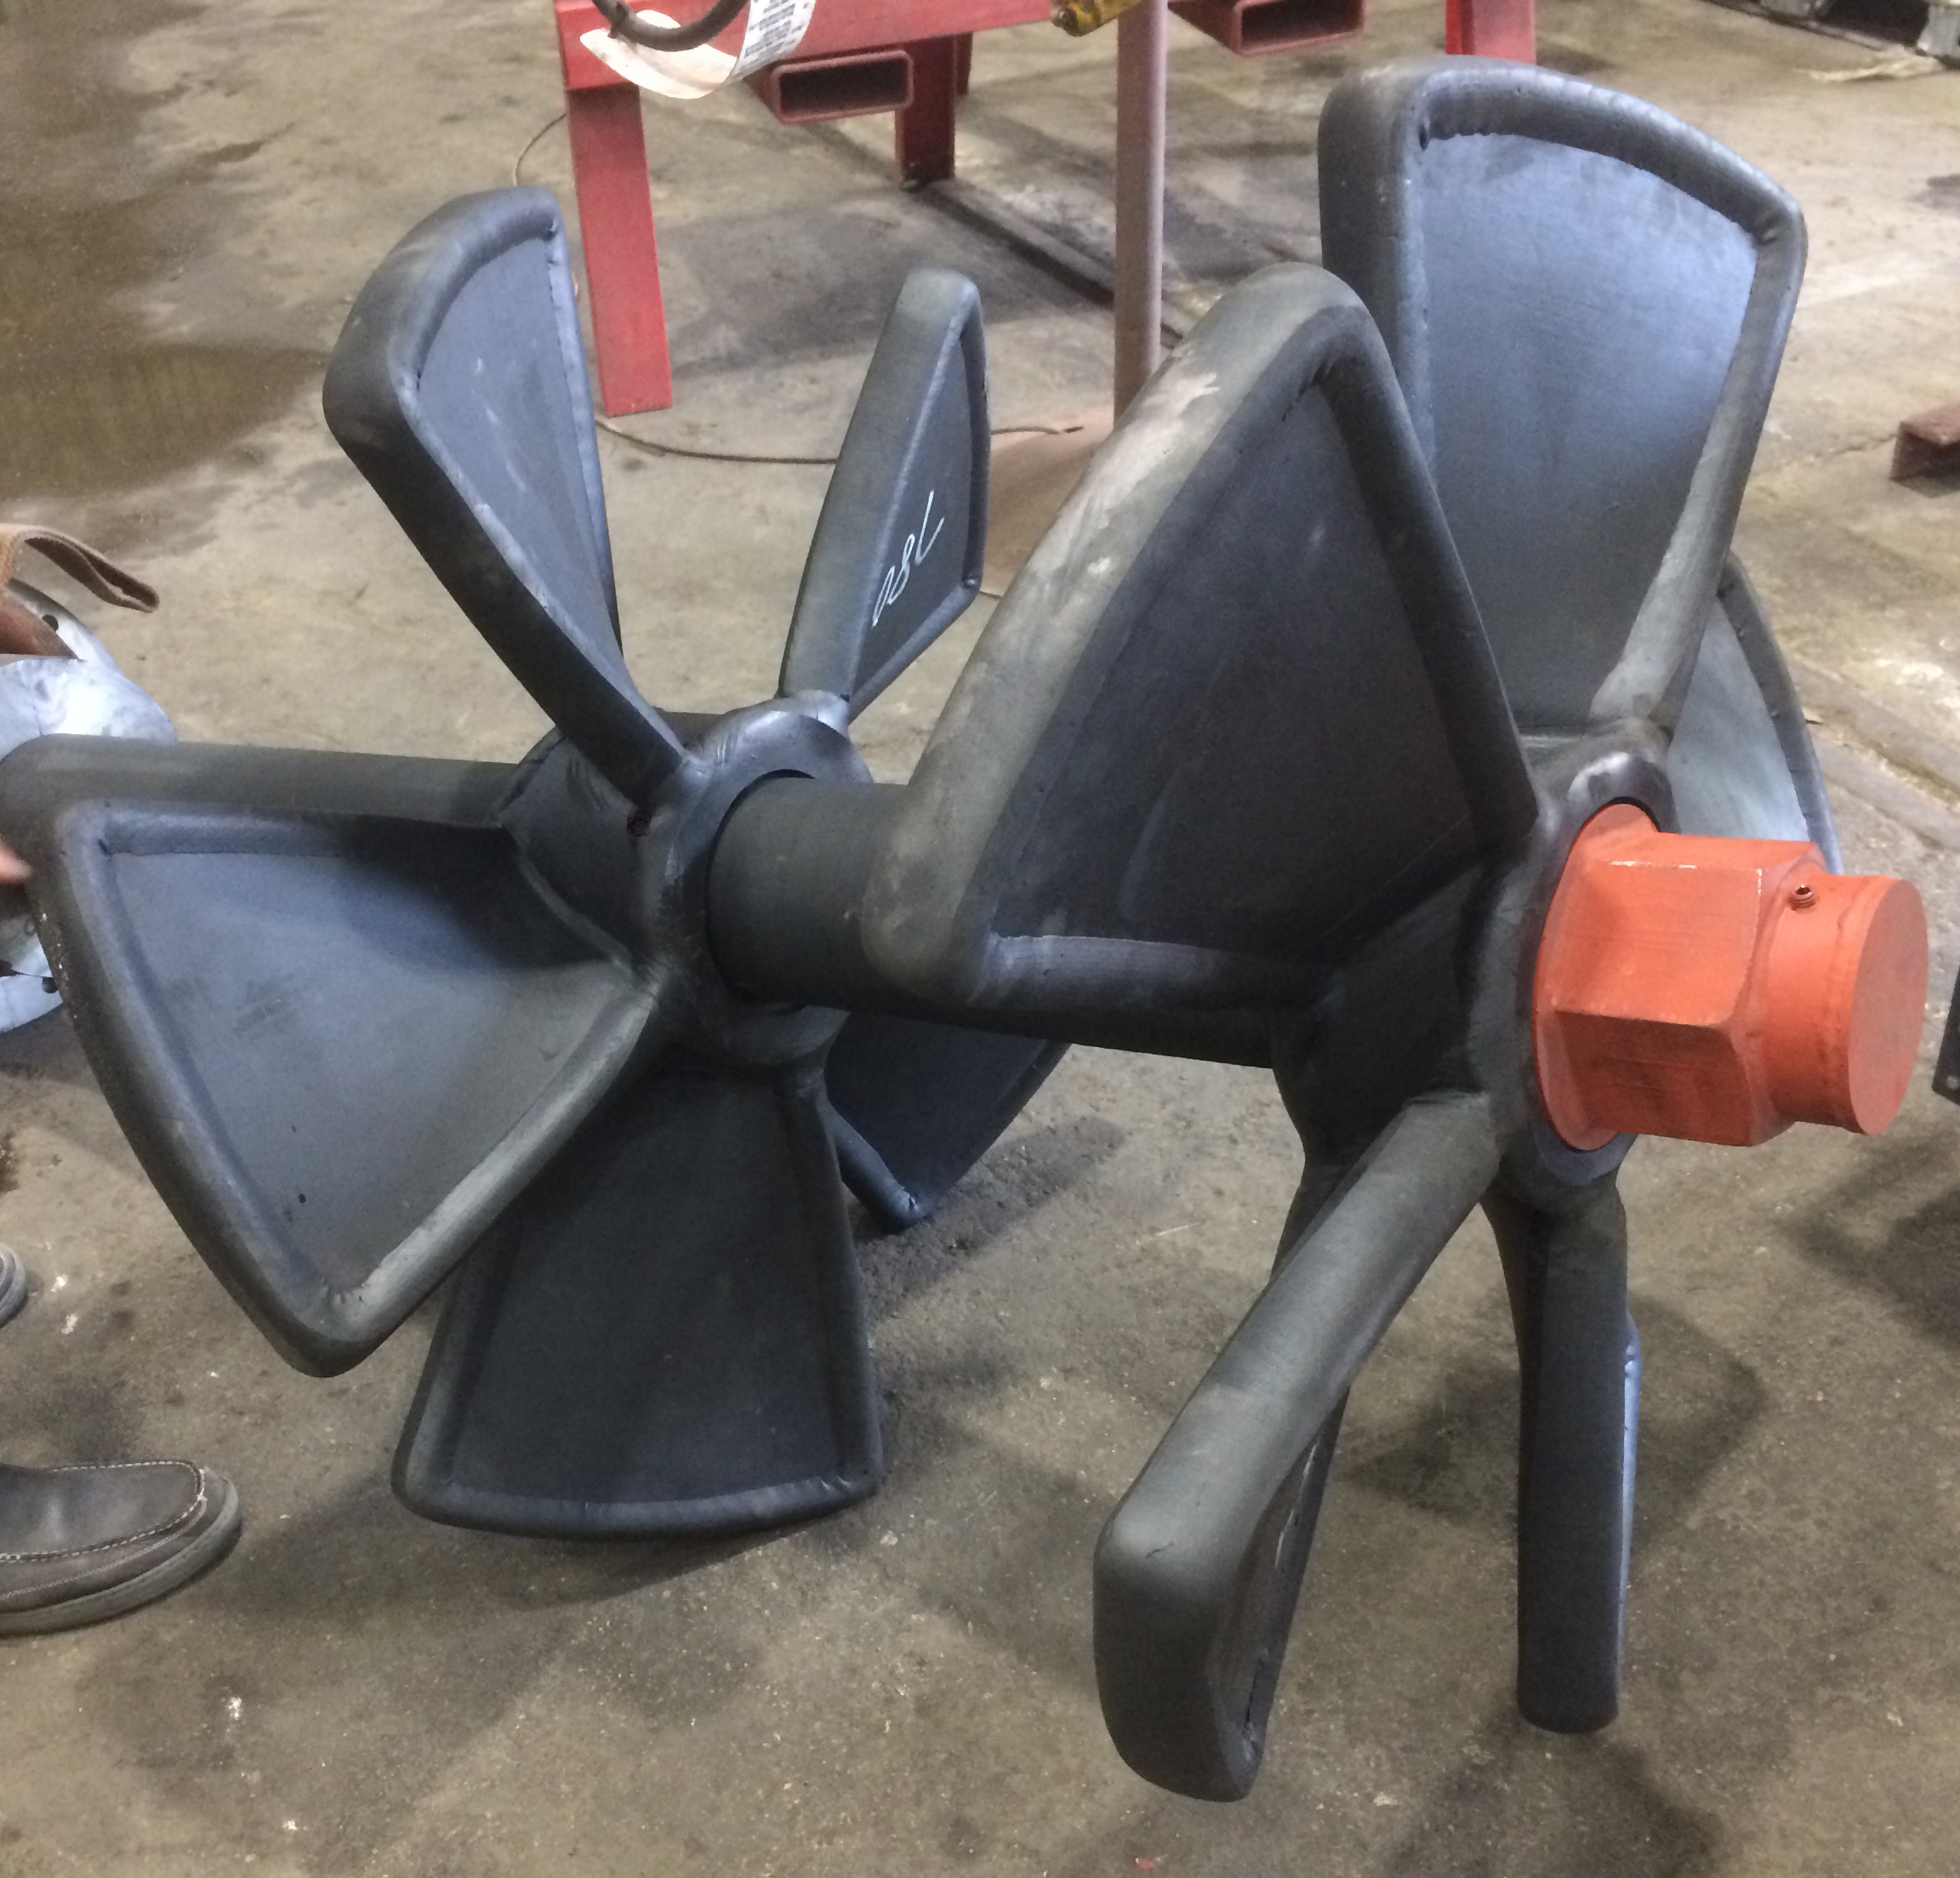
The scrubbing action that takes place inside each cell of an Attrition Scrubber is achieved by a shaft containing two turbine blade propellers set at opposite pitch. The top propeller pumps material down, while the bottom propeller pumps material up — this creates the particle-on-particle interaction needed to scrub the sand grains free of contaminants. These propellers are crucial to the abrading of the material, so you want to be sure they are in good working condition.

A shaft with two turbine propellers for an Eagle Iron Works Attrition Scrubber.
After shutting down the machine and locking out/tagging out the power source, perform an inspection of the propellers. Check that the paddles are intact and that the rubber lining has not worn, torn or is missing. If the rubber is compromised or gone, the underlying steel paddles will be subject to the harsh conditions inside the Attrition Cell and wear out very quickly. At that point, you’ll need to order new propellers or even an entire shaft assembly.
6. Allowing the rubber liners to wear
Like the propellers, the inside of the Attrition Scrubber is also lined with rubber. While following the proper lock out/tag out procedures and all site-specific safety procedures, this rubber liner should be inspected to make sure it is intact and that there are no bubbles in the rubber. You should also make sure the liner is not pulling away from the wall of the machine. As with the paddles, if the rubber wears away, the underlying steel walls will wear out and cause harm to the structure of the machine.
7. Starting the machine under load
You should always start up your Attrition Scrubber before introducing material to it. Do not start the machine under load. The Attrition Scrubber should be drained to be level of the lower propeller blades before starting, as possible damage to the unit may result.
The correct amount of moisture to add can best be judged by visual observation and simply controlled by adding enough water to the feed to get the material to flow through the machine.
The abrading action of the Attrition Scrubbers depends on the density of the feed material. For most efficient abrading action, the solids content of the feed should be 65% to 85% by weight, depending on the type of feed. For example, silica sand should be fed to the Attrition Scrubber at 75% to 85% solids.
At the end of the day, frequent inspections and routine maintenance are key for keeping your Attrition Scrubber running efficiently.

